Products About Me Home Classroom Freebies TeachersPayTeachers Pinterest Email Facebook Image Map

January 29, 2015

Musical EET - DIY Therapy Game

Most SLPs are familiar with Expanding Expression Tool, or EET in short, an amazing therapy technique to work on description skills (find out more information about EET here). EET is my go-to strategy whenever I have students working on describing an item.

For those of you unfamiliar with EET, it is basically a visual of multicolored circles. Each circle represents a different descriptive aspect of an item: Green - Group, Blue - What does it Do, Eye - What does it look like, Brown - What is it made of, Pink - Parts, White - Where do you find it, Orange - What else do you know?

Students are guided through this hierarchy and provide the respective information about the item they are describing. I like EET because it is visual and easy to implement.To add some variety to my EET session, I came up with a really fun game that my students just loved: Musical EET! And the best part is that you can recreate it for virtually less than $1.50.

You will need:
* Felt sheets (Green, Blue, White x2, Brown, Pink, Orange)
* A paper plate or other large circular object
* A marker
* Scissors
* Some sort of music
Cheap materials.
Preparation:
1. Using the paper plate and marker, draw circular templates onto each felt sheet.
2. Cut out the circles.
3. On one of the white circles, draw the outline of an eye and cut a smaller circle from the leftover blue felt which is glued in the middle of the eye (this will be the iris). Draw some eyelashes.
4. On the orange circle, use the marker to draw a big question mark.


Our EET circle.
Once all of the circles are ready, place them in a big circle on the floor. The circle should be large enough for students to walk around the outer perimeter without being crowded. Also note that if you have bare floors, students may slip if they step on the felt. It is therefore most feasible to do this activity on a carpet. If you don't feel like taking the time to make these circles or have bare floors that are not conducive or safe for felt, you can buy non-slip steppers from the company (unfortunately only with the purchase of the entire kit).

Game play.
Tell the students that they will get to play a game like musical chairs. Start playing some music. As the music is playing, have students walk around the circle. When the music stops, they have to stand by the nearest circle. Once everyone is placed at their spot, they will look at a "mystery object" (i.e. a picture card) and have to provide the information about the item based on the color of their circle. For example, if they are standing on the brown circle, they have to state what the item is made of.

My students had a blast with this game and the activity reinforced their memory of what each color stands for. In addition, the movement piece added a kinesthetic component and was especially feasible for my students with an ADHD diagnosis. 
~Viola

January 25, 2015

Teaching Creative Problem Solving through Play

Note: This post contains affiliate links.

The family of one of my third graders gifted me an amazing game for Christmas: "Obstacles" by eeBoo. This award-winning educational game is designed to teach creativity and imaginative problem solving skills through cooperative play. Obstacles has  become a therapy staple over the previous month and all of my students ranging from grades 1 through 5 are thoroughly enjoying it!

Obstacles is designed for 2-5 players ages 5 and up. It consists of 25 large rectangular "obstacle" cards and 100 smaller square "tool" cards. The objective of the game is to utilize the tool cards in a creative way to overcome the obstacles in order to reach your home. The obstacle cards consist of a variety of barriers to prevent you from reaching the home card: there are bees, swamps, thunderstorms, walls, borders, mazes, ogres, poison ivy, etc., all of which have to be overcome. And all players have are their tools. The tool cards contain some very useful to some very bizarre items: a kite, a silver platter, a bow & arrows, a drum, ice, a saw, a rocket, a jack-in-the-box, salt & pepper, a monkey, a compass, etc.

To play, the dealer randomly places obstacle cards on the table to create a path. For a short game, fewer cards are used, for a long game, more cards are used. My students always want the longest path possible (i.e. the length of our therapy table).

According to my students, the longer the obstacle path, the better! I hope you have a long table...
Each player then receives a number of tool cards (this number changes based on the amount of people playing). To make it easier for students you can give them more tool cards, to make it more challenging, you can give them fewer. These tool cards are placed openly in front of each player.

The first player chooses a tool card and explains how they would overcome the first obstacle on the path. Players then take turns doing the same. The rules encourage players to use their imagination and be creative -- for example you could use the salt and pepper tool card to make yourself sneeze so hard that all the sand gets blown out of the desert. Once each player has made a proposal about how an obstacle should be overcome, the group discusses additional possible solutions (tool cards may even be combined). After the discussion, the group votes for the best solution and discards the tool cards that were used during this turn. Players replenish their hands and tackle the next obstacle.

I have modified the rules a little bit to suit my own needs better. I give each student their picture from my schedule board to be placed at the beginning of the path. This picture acts as a game pawn and allows students to track their progress. Each student then receives four tool cards (I found that this allowed for just the right challenge level). Students then take turns proposing how one of their tool cards can be used to overcome an obstacle. If the group agrees that this is a viable option, they discard their old tool card, advance to the next obstacle, and add a new tool card to their hand. If a student gets "stuck", I allow them to ask other players for ideas or discard one of their tool cards for a new one (in lieu of their turn).


Bees, a border, tacks, and poison ivy... above are the tools my students used to overcome each obstacle!
This game gives me a good idea of which students can think "outside the box" and use their creative thinking skills to overcome these obstacles. My HFA groups are struggling with this, so it is a good exercise to improve in this area.

This game also lends itself to teaching students great new vocabulary, as many of the tools consist of items they may not be familiar with: stilts, lever, compass, catapult, tacks, fabric, sewing, copper pot, pulley, are just some examples.

In terms of quality, the cards are made of a thick sturdy cardstock that will hold up to little hands. Obstacles is a fantastic game and I can't recommend it enough!

January 22, 2015

Teaching Students How to Size Up a Problem

https://www.teacherspayteachers.com/Product/Problem-Solving-Pack-Unit-on-little-medium-big-problems-social-skills-ASD-1279690
Get it here!
I haven't advertised a TPT item in a while, so I thought I would showcase one of the

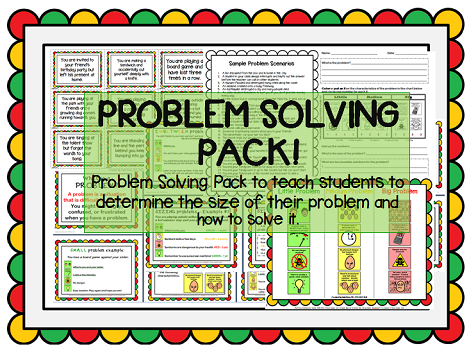
more popular items in my store: a "Problem Solving Pack" created to show students how to accurately define the size of a problem and to teach basic critical thinking and beginning problem-solving skills. 

I have a lot of kiddos on my caseload that have a complete meltdown when they lose a game or during some other trivial mishap, which is what inspired me to create this resource. Since this is usually an area of need for students on the ASD spectrum or those with social communication disorder, most SLPs can probably find value in this packet.

Problem sizes are grouped by little, medium, and big, and in order to fit a particular size, students are encouraged to think of the four aspects that make up a problem:

(1) the number of people involved in or affected by the problem
(2) the duration of the problem
(3) the level of physical danger involved
(4) the time it takes to solve this problem

I assigned numerical values to each characteristic, which helps students "calculate" the actual problem size in a very structured manner. Students can then fill out an accompanying worksheet to help them organize and guide their thought process.
Overall, this packet includes the following PDF files:
• A collection of 120 premade problem scenarios in two separate formats (as 3.6” X 2.6” cards as well as in black and white list format)
• 9 blank cards to add your own scenarios as they occur in your students’ lives

• A step by step lesson plan / presentation to go over with your students
• A letter-sized visual poster to remind students of the characteristics of each problem size (both color and black and white)
• A worksheet template to help guide students through analyzing a problem's size
• 4 sample worksheets to guide the teacher / therapist on how the questions should be answered

I created and improved upon this packet throughout the last school year as I was developing and using these lessons with my own students in a social skills group and small group therapy setting. It really seemed to work for many of them – I, as well as other support staff have noted some marked improvements in target students’ reasoning and behavior control skills about daily challenges.

I have used these materials with 1st through 5th graders (although the worksheet is geared towards my older groups), but will work well for middle school and high school students as well due to the relative complexity of the subject. You can also just use the problem solving cards as a quick therapy activity to work on identifying and solving problems. 


For some other great resources on problem-solving using the four problem characteristics, visit Jill Kuzma's blog. There are also some great resources on Pinterest. Problem-solving is such a basic skill that we take for granted. It is important to remember that many of our students need guided teaching to improve and master this concept.
~Viola

January 19, 2015

"Have You Filled a Bucket Today?" & Activity

Due to the holidays and tons of special events at school, our social skills group was on a brief hiatus. Now that all of the festivities are done, we are back at it! Our last two sessions were spent learning about bucket filling. If you don't know about bucket filling, you are seriously missing out on a great teaching opportunity of sending students on the path of becoming a kind and caring person.

The book "Have You Filled a Bucket Today? - A Guide to Daily Happiness for Kids" by Carol McCloud is really all you need to get started. The book suggests that everyone walks around with an invisible bucket -- this bucket contains all of an individual's positive thoughts and feelings about themselves. You can fill someone's bucket by being kind to them and showing them love. By doing so, you fill your own bucket, as well. This makes you a bucket filler. However, if you choose to be mean and unkind to others you are a bucket dipper -- you take away the positive thoughts and feelings from someone else. Bucket dipping empties your own bucket, too. 
Bucket filling activity!
I love using this book to teach students about kindness and empathy, as well as some early perspective taking. My students always really enjoy the pictures, as well: the buckets always resemble their owners and the kids like pointing out the similarities. You could also ask them what they think their own bucket looks like (hey, since it's invisible, there are no right or wrong answers!).

During the first session of our social skills group we simply read the book and discussed it. Asking my students to think about the things they had done just this week to fill or dip into someone's bucket gave them some serious food for thought. I opened the next lesson with a game: I brought little tin buckets for each student as well as some tokens (I used "kindness coins" -- I purchased both items at Oriental Trading a couple of years ago). After each student received a bucket and we reviewed what bucket filling and bucket dipping means, students picked a scenario card that I had typed up. Each card contained a situation that was either an example of bucket filling or dipping. Students had to identify what kind of scenario was portrayed -- if it was bucket filling, they received a coin for their bucket; if it was bucket dipping, they had to remove a coin. This was also a great activity to work on how to deal with losing ;).

For those of you who have previously purchased my Social Skills Curriculum, you will find that I added this activity to Lesson #6, complete with buckets, tokens, and scenario cards. And if you have not yet added this little book to your library, I highly recommend it! I get a lot of mileage out of this concept with my students.
~Viola

January 6, 2015

Game Review: Telestrations & Reverse Charades

Note: This post contains affiliate links.

I wanted to showcase two games that are designed to help students practice non-verbal communication skills. Although our therapy is usually focused on verbal expression, I think being able to supplement a message with different means of communication is an important skill for someone who presents with a language delay.

Telestrations and Reverse Charades by USAopoly are games geared towards older students (middle school to adult) and provide an excellent means to practice communicating non-verbally / through alternate strategies. This makes these games a fun special activity to do with large middle or high school speech groups (think end of the year parties!). Of course they also lend themselves for private game nights at home. Keep reading below to see how each of these games plays out (no pun intended):

Get it here.

TELESTRATIONS

This game is recommended for 4-8 players ages 12 and up. It is kind of like playing "Chinese Whispers / Telephone", but relies on drawing rather than whispering. The object of the game is to guess a mystery object based on people's drawings.

The contents of the game include cards listing objects/phrases/actions, 8 booklets for players to draw in,  8 dry erase markers, 8 cloths to clean your booklets, a sand timer, and a die. The player booklets are laminated to allow for use with a whiteboard marker and can be erased. This ensures that you can use them over and over again without wasting paper.

To play, each player receives a booklet, each of which has 8 tabs on it (looks kind of like the picture on the box). Everyone then chooses a card and rolls the die. Each card has 6 numbered words or phrases (e.g., electrician, flat tire, camping, attic, minivan, etc.), and players find the term that matches the number on the die. This term is recorded on the first page of the sketchbook. Depending on the number of players, the sketchbook is then passed to the player on the left. This player secretly looks at the original word, flips the page, and sketches a picture of it. The book is then passed on again, so that the next person looks at the picture. Based on the picture, they write down what they think it is on the following page and pass the book on so that the next person can sketch a picture of the previous person's written guess. This goes on until the book reaches the original owner.

There is not really a winner or loser per se, and the main idea is for people to have fun. There are some alternate rules for scoring for more competitive groups.

The idea is pretty clever, and I could imagine students coming up with some hilarious ideas. It would also be interesting to discuss with groups how one player interpreted a picture differently from its original meaning.

This game has rave reviews on amazon and is the winner of multiple awards. Even though it is a little bit different from what we usually work on, I think it is a good fit for a middle/ high school speech room and would motivate students to participate in the session! And of course it would make a great game for social skills groups, as well.


Get it here.
REVERSE CHARADES

Most everyone is familiar with the basic game of charades. Reverse Charades offers a fun and novel twist to the old way, breathing new life into the concept. This game is recommended for 6 or more players ages 6 and up (although I think it may be difficult for younger groups). There is a junior version on the market, which may be more appropriate for elementary aged students.

The contents of the game include a sand timer and 720 different words and phrases on cards. The object of the game is to guess as many actions or concepts that are being acted out by a group of players within a 60 minute period.

To play, split the group into teams of three or more. One person on the team is chosen to be the "guesser" (players take turns being the guesser). The other players on the team then choose a card that they will have to act out. The cards contain a wide variety of ideas, such as pie-eating contest, triathlon, cow-tipping, etc. The guesser has to figure out what the rest of his/her team is trying to communicate. The rules permit players to use objects (and even people) in the room to help them act out their secret word. For each guessed word, the team scores a point.

This is another fun and award-winning party game! The only downside for elementary ages is that the younger language delayed crowd probably doesn't understand what many of the words mean. I am planning to purchase the easier junior version for them.

Reverse Charades would also make a great team-building exercise (think social skills groups). This game is another great way to get middle and high schoolers involved in your session!

Even if these games may not be appropriate for your caseload, they may be just what you need for your next game night!
~Viola