Products About Me Home Classroom Freebies TeachersPayTeachers Pinterest Email Facebook Image Map
Showing posts with label Therapy ideas. Show all posts

September 29, 2018

Games for Speech Therapy - Part 1: Cause & Effect Games


Do you like to use games in Speech, but are tired of playing the same ones over and over? This Blog series will introduce some of my personal favorites!

Please note: This post contains affiliate links.

I love playing games with my students, both for motivation with my younger kids as well as for educational purposes. Games are so great for working on social skills such as turn-taking, conversation skills, sportsmanship, etc. The posts in this series will be organized based on the types of games, and will include cause & effect games, vocabulary games, cooperative games, logic/strategy games, movement games, card games, and social skills games.

The first games I want to talk about are Cause and Effect games - these are games where one action makes something else happen, and these games work really well with my SDC and younger students.

1. Pop Up Pirate: Most of you probably own this game, but if you don't - get it! Turns are fast and this game is highly motivating for students of all ages. Players take turns sticking swords into a barrel until the pirate pops out. Language skills you can target are color identification, requesting, as well as concepts "in" and "out of". Because each turn is super-fast, it lends itself well to a quick motivator.

Favorite Games for Speech Therapy
Pop-up Pirate
2. Pop the Pig: My SLPA introduced me to this game and this is another favorite of my students. Students take turns rolling a die and feeding the pig hamburgers. At the end of their turn, they press down on the pig's head, making his belly expand. If the pig's shirt pops open, the player wins. Good skills to target are color identification, counting, the concepts "down", and turn taking.
Favorite Speech Therapy Games
3. Crocodile Dentist: This is another favorite with quick turns. Players take turns pushing down a tooth until the crocodile's jaws snap shut. Good concepts to target are "push", "down", "closed", and "open". When you buy this, make sure you get the Hasbro version - the knock-offs don't work well, as indicated by other reviewers.
Favorite Games for Speech Therapy
Crocodile Dentist
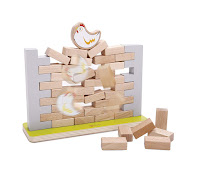
4. Pick a Brick: I have a love-hate relationship with the game Jenga. While I like the concept, any little bump against the therapy table makes the whole thing come crashing down. This is where Pick a Brick is a great substitution and perfect for little preschool hands, too! The concept is similar to Jenga - players remove a block by pushing it out of a wall. The goal is not to make the chicken that sits on top fall down. A difference is that blocks do not get stacked on top of the wall after being removed. Because the blocks are being contained between two pillars and sit on a sturdy base, the blocks don't fall down if the table gets bumped (although the chicken might fall off). Concepts to target include "push", "on top", "off".
Favorite Games for Speech Therapy
Pick a Brick
5. Funny Bunny: This game gets requested often by my students. Players move their bunnies up a mountain while trying not to fall into the holes on the path. I have a more in-depth review of Funny Bunny here. Skills to target include counting and words for final consonant deletion.
Favorite Speech Therapy Games
Funny Bunny
6. Bunny Hop: This game is another popular choice among my students. A more in depth post about it can be found here. Students roll a die and see if a bunny of a particular color will jump out of the board when a farmer is pressed down. The first player to collect a bunny of each color is the winner. Good skills that are being targeted with this game are color identification and memory.
Favorite Speech Therapy Games
Bunny Hop
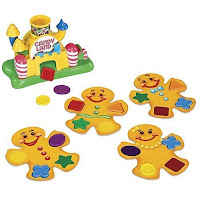
7. Candyland Castle: This is one of my favorites, but unfortunately it is out of print (I already e-mailed Hasbro about it - no chance of this one coming back anytime soon). If you ever see it in a thrift store or at a yard sale -- grab it! Every player has a gingerbread man board with four shapes on it. Players take turns pulling the candy cane on the castle to make a plastic shape pop out of the gate. If the shape matches one of the shapes on their board, they get to put it on. This game is perfect for preschool and younger students. Turns are quick and you can target shapes, colors, and turn-taking.
Favorite Games for Speech Therapy
Candyland Castle
8. Cariboo: No list would be complete without Cariboo... which is sadly out of print (time to hit up the thrift store!). You all know this one-- Players pull cards and use a key to open compartments that have a matching attribute. If they find a ball they place the ball in a hole to see if the treasure chest will open. It is the perfect game to target letter / shape / color / number identification, memory, and matching. Additionally, you can replace the cards with your own to target specific language skills. Cariboo is one of my most requested games and I feel so fortunate to own a copy!
Favorite Speech Therapy Games
Cariboo
9. There's a Yeti in My Spaghetti: This is one of the newer additions to my speech room, and so far my kids have been enjoying it! Players pull out spaghetti in such a way to prevent the yeti from falling into the bowl. It's a good game for strategizing and turn-taking.
Favorite Speech Therapy Games
There's a Yeti in My Spaghetti

10. Jumping Jack: This game is like a reverse pop-up pirate. Players spin the spinner and either pull out 1 or two carrots, lose a turn, or take a carrot out of their basket. If the bunny jumps out when a carrot is removed, the player has to be able to catch the bunny to win. Otherwise the player with the most carrots is the winner. While I prefer Pop-up Pirate (faster turns, longer game play), this game is nice to throw into the game rotation.
Favorite Speech Therapy Games
Jumping Jack

What Cause-and-Effect games do you play in YOUR therapy room? Please share in the comments!

September 26, 2018

Simplify Articuation Therapy with Word Cards


After 10 years of using them, I have to admit I am so over individual articulation card decks. While they are great when playing Go Fish or some other type of matching game, they are a real pain in the you know what for drill-type activities. They rarely stay in the order I want them in and all get mixed up, sometimes ending up spread all over the table.

This is why Word Cards are one of my favorite things to use. Word cards are basically just a single sheet with a bunch of words printed on it. Each card is organized and color-coded by word position. You can whip out a sheet in therapy and just have students "go" without worrying about flipping cards and potentially creating a mess on the table. Since many of my younger students are not proficient readers yet, I wanted not just a word list, but needed something with picture supports.I had made my first Word card many years ago using the clip art available in Microsoft Word. I finally got around to remaking the cards and "beautifying" them by using cuter clip art. So now you too can indulge! They have been a a true life saver and are available on TPT here.

I use these cards for drills, bingo (you can do this when students are working on different cards), and other open-ended activities (finding a word by listening to the description, comparing and contrasting two words, etc.).

These cards are also great for a functional bulletin board idea that also serves as a storage opportunity. For each sound, I cut the top 3" off a large manila envelope, wrote the sound on it (I used thinking/talking bubble bulletin accents from Lakeshore), and laminated it. Then I used thumbtacks to stick each envelope on the wall and placed my cards inside. When students get to Speech, I can just tell them which card to grab. For example, if they are working on /r/ in medial position, I will say, "Grab a blue /r/ card". That way they can get started on their drills with no time wasted.

If you pick up these cards in my store, I hope you love them as much as I do!! Leave a comment to share how you would use these cards!

September 16, 2018

Using STEM in Speech: Fossils


Note: This post contains affiliate links.
 
Due to some craziness in my personal life, I had to take a break from blogging for a while. I did have most of this post sitting there in draft form, and really want to finally get it posted here, since my students had such a great time with this unit!

Since we had just covered Rocks and Minerals in Speech, it made sense to tackle fossils next! A lot of my students are really interested in dinosaurs, so of course this unit was a big hit with many of them. To my surprise, a lot of my kiddos were able to name all kinds of dinosaurs, but didn't exactly know what a fossil was. Most of them thought a fossil was just a leftover dinosaur bone, rather than a rock. Below are some of the various activities I did with my groups (of course tailored to their various skill levels and type of goal they were working on):

1. Learning about the different types of fossils
Before any of the activities, I did briefly explain the different types of fossils to my older students.  Here's the run-down (don't worry, I had to google it, too!):


  • mold fossils (a fossilized impression made in the substrate - a negative image of the organism)
  • cast fossils (formed when a mold is filled in)
  • trace fossils = ichnofossils (fossilized nests, gastroliths, burrows, footprints, etc.)
  • true form fossils (fossils of the actual animal or animal part).


2. Exploring and matching cast fossils
For this, we used this Fossil Sorting Activity Kit by Dancing Bear (the same company the mineral kit was from). We used this kit to work on describing, comparing and contrasting, matching the fossils to the cards, and to practice articulation targets by saying the name of the fossil / reading the description from the cards out loud. The kit comes with a couple of magnifying glasses that students could use to get a better look. I used a jewelry organizer to store the fossils, but the kit also comes with small plastic bags for this purpose. This was definitely a hit, kids still ask me if we can "do the fossils again" (even though we did this back in January).

3. Matching "bones" to their mold fossils 
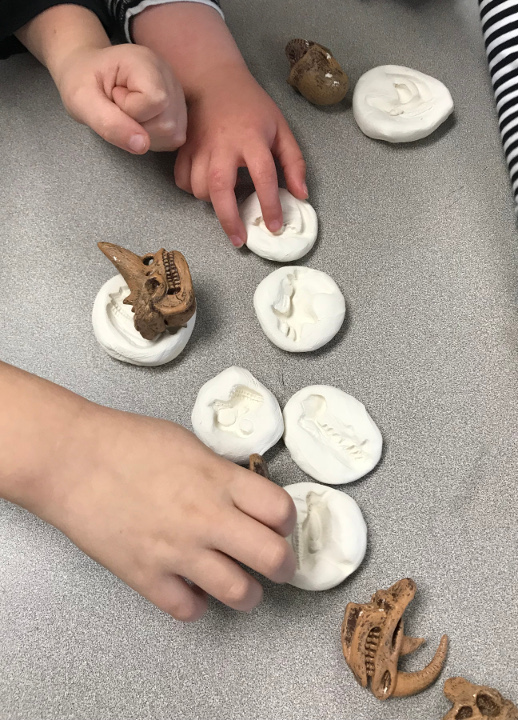
For this activity, I purchased the Safari Toob with the Prehistoric mammal skulls as well as some of the Crayola Air Dry Clay (I initially tried Playdoh... DON'T! It got stuck to my skulls and created a giant headache). I used the clay to make some spheres that I patted flat and then used a skull to make an imprint of the mammal. After letting the clay dry, we had the perfect matching activity!


4. Making mold fossils
This was a nice activity for kids to take home! All you need are some toy dinosaur bones and Playdoh (or the clay from the previous activity). Have students make a sphere and pat it flat to get an oval shape (just make sure it's not too flat, or they might make holes if pressing to hard). Then have them press down their dinosaur to make a mold fossil. Let it dry and then let students take it home. This was a quick and easy activity for my younger students.

5. Making a True Form Fossil
I reserved this activity for my 5th graders.If you've seen "Jurassic Park", then you'll be familiar with bugs encased in Amber. I had my students re-create this true form fossil by having them trace the shape of a clear glass gem (like these vase fillers) onto a piece of construction paper, draw a bug in the middle of the circle, and color the background yellow-orange-ish. After cutting out the circle we used Mod-Podge to glue the gem to the paper. It made a pretty craft that could easily be turned into a fridge magnet.
 
All in all, my students really enjoyed the fossils unit and got exposed to lots of new vocabulary and concepts. Since they're still asking about it, I'll definitely be bringing some of the activities back this year!


January 13, 2018

Using STEM in Speech: Rocks and Minerals

Note: This post contains Amazon affiliate links.

For the months of November and December, our STEM unit focused on Geology! A lot of my students surprised me with how into rocks they were and many of them already had some basic knowledge about different rocks and minerals.

Since I have groups functioning at different skill levels, I had to make sure to come up with activities that would fit my students' level of functioning. Here are some of the activities we did to learn about rocks and minerals:


1. Geology Lap Book
My older language students got to make an interactive rock and mineral lapbook. I bought the template for this product on TPT. It is a  great tool for teaching about the layers of the earth, the rock cycle, different types of rocks, the difference between rocks and minerals, features of minerals, and key vocabulary words. It was a great activity, but I should note that this activity would work best with students you see twice a week - even though I pre-cut many of the items, it still took us 3-4 sessions to create the whole thing. My students liked being able to take something home after it was finished. You will need a file folder for each student.

2. Explore Rock Types
This activity allows you to teach students about the three different types of rock and works for a variety of groups. I purchased three different sets of Rock Specimen by Educational Insights: (1) Igneous Rock Collection, (2) Sedimentary Rock Collection, and (3) Metamorphic Rock Collection. We talked about how the different types of rocks are formed and described each rock by its appearance. We then used the included reference sheet to find out the name of the rock. This activity worked well for older language and articulation students. It was challenging to match some of the rocks to the correct picture due to lighting differences in the photography, but we still had fun!


3. Mineral Sort
This activity was probably my students' favorite and was one that I could use with all of my groups, even my younger SDC caseload! Using Dancing Bear's Rock & Mineral Collection Activity Kit, we described the appearance and texture of the different minerals and then used the reference sheet to find the name of the mineral. You can target different skills with this activity, as well, including expressive language, articulation, fluency, and even social skills (sharing the minerals and not fighting over who gets to describe and match a specific mineral). This was definitely a favorite!


4. Making Pet Rocks
This activity was perfect for my younger students and SDC students! Prior to this lesson, I collected some rocks in the park behind our school and washed them. It would have been fun to let my students do this, but we just didn't have enough time. Then I let my students decorate their rocks with googly eyes, pompoms, beads, buttons, sequins, ... whatever! You can use this opportunity to work on appropriate requesting ("I want a blue pompom, please") with lower functioning kiddos. We used a Pet Rock worksheet that is included in this TPT packet by Reagan Tunstall to give our rocks some personality. This was a fun activity and all of our rocks turned out super cute!

Hopefully this gives you some inspiration for your own rock and mineral STEM lesson in Speech! What is another activity you can think of? Feel free to leave a comment!

November 30, 2017

A ROCKing Speech Activity

Our monthly STEM theme is Rocks and Minerals. While a more detailed post on all of our various STEM activities will follow, I wanted to showcase one product that we've been getting a ton of mileage out of during our sessions as it can be adapted to different disorders and ability levels: Dancing Bear's Rock and Mineral Kit.

This kit contains over 150 random pieces of rocks and minerals, including two geodes, arrowheads, and shark teeth. There is also a reference sheet that you can use to identify the minerals. Prior to using the kit in therapy I sorted the pieces into their respective categories and placed them in a jewelry organizer (although this might have been a fun activity for students in and of itself!). Here are some different therapy activities that I have done with my kiddos so far:

1. Describing: This is a great activity no matter whether a student is working on language, articulation, or fluency. We talked about the shape, size, color, and texture. A lot of my younger students didn't know what "rough" versus "smooth" meant, so we were able to hit those concepts pretty hard. You can also sneak in words like "opaque" and "translucent".

2. Matching: This was a favorite activity! After describing each mineral I had students find them on the reference sheet. This is a great activity to promote team work / social skills.
3. Guessing game: Another fun activity we did was "Mystery Mineral". I had students pick a mineral and provide clues based on the mineral's attributes. Once again, this activity could be adapted for different goal areas.

4. Compare and Contrast: We also used this minerals for a basic compare and contrast activity. You can use a Venn diagram to talk about the differences.

I love the hands on nature of these activities! My students enjoyed looking at the different minerals and learning their names. This kit had such a nice variety of stones and really allowed me to blend Speech targets with science concepts. I'll be using this kit for years to come!
What other activities do you think could be done with this kit? Feel free to comment!

October 22, 2017

Using STEM in Speech: Skeletal System

Note: This post contains affliate links.

Given all of the spooky skeletons everywhere in the month of October, our monthly STEM unit revolved all around bones and the skeletal system. Just as with the unit on Density, you can incorporate tons of language concepts and adapt the activities for articulation/fluency/social skills. Below are some ideas to get started.

I introduced my groups to the concept of bones by reading the book Bones (Science Readers: A Closer Look). With my younger/SDC kiddos we read Skeleton Hiccups. Of course, you could read any Halloween themed book about skeletons to get into the mood.

I also purchased some Halloween decor at Walmart: An (anatomically correct - this is important!) Skeleton, as well as a "Bag of Bones". We used these props to talk about the different bones in the body and learned some of the scientific names. There are some great bones containing /r/ and /s/ - femur, humerus, skull, pelvis, ribs, spine, etc. that you can have your artic students practice. The bag of bones was great for guessing which bone was which by comparing them to the bones in the skeleton model. Bonus: I can reuse these guys as Halloween decorations!

Students loved exploring the animal x-rays!
Next, we got to the fun part!! I discovered two different sets of X-Rays on amazon - Animal X-Rays and Human X-Rays. We used the animal x-rays to compare the skeletal structure of different animals to that in a human body. I also had students try to guess what animal might be depicted by the x-ray. You can also have students compare and contrast the skeletal structure of two different animals.

Putting together human x-rays
I used the set of human x-rays to solidify students' knowledge of the names of bones and our general skeletal structure by having them assemble the skeleton on white butcher paper. This was actually harder for many of my kiddos than they anticipated! They were allowed to use a diagram of a human skeleton, as a reference. When they were stumped, I gave them hints such as, "This is an x-ray of a tibia." They then had to reference the diagram to figure out where the bone would go.

As an extension activity, we made the Q-tip skeleton that is plastered all over Pinterest. Students had to "earn" each bone by either saying their speech sound 5x or completing a language task. Tip: Make sure to cut all of the Q-tips prior to the activity, as it will save time in the long run.

What I loved about this unit was that I was able to incorporate STEM in a Halloween-themed unit, while teaching students about important concepts AND working on their speech goals at the same time. Win-win!!

October 5, 2017

Using Blank Playing Cards in Speech


Note: This post contains affiliate links.

As I was browsing Amazon for therapy materials over the summer, I came across the most amazing thing: blank playing cards! As soon as I saw them, the wheels in my head started turning to come up with ways on how to use them in Speech.

I tried out three different variations of blank playing cards made by Apostrophe Games: Rectangular, Square, and Dry Erase.

Blank playing cards are available in these three options: rectangular, square, and dry erase.
If you’re like me, you are probably tired of using the same old artic decks over and over in your sessions. To combat the monotony, my students and I decided to use these cards to make our very own articulation decks! At first I thought that we could use index cards. However, the quality of these blank playing cards is SO MUCH BETTER and definitely worth the extra money.They are about 2-3 times as thick as index cards and marker / Sharpie does not bleed or seep through to the other side. Since you will likely end up using the finished cards with your students in therapy sessions, it makes sense to want them to be durable. They are so thick that you could even skip laminating - seriously, who has time for that?

I started by having my groups come up with words containing their target sounds. This was great for stimulating their awareness of their sound. As they were rattling off words, I wrote them onto the playing cards with a Sharpie, making sure to highlight target sounds in red. Of course you could have students write the words themselves, but I wanted to make sure the writing was nice and big and didn't have spelling errors. To make this more engaging, I allowed students to include Pokemon and Minecraft things (Hey kid, if you want to practice the word "creeper", which has two /r/ sounds, be my guest!). Next, students drew pictures of their words onto the card (we used washable markers for this), although pencils or crayons would work as well. While we worked, we also practiced saying the words we were drawing. Students were super motivated throughout their session. And look how awesome their cards turned out!

I used both Square and Rectangular cards for this activity and didn't really have a preference. The square ones seemed to be big enough for a picture, and also might be better for little hands.

This would also make an excellent homework activity: send home ten blank cards with the words on it and have students draw and practice at home. You could also let students keep their cards at home for practice.

And of course you could adapt this activity for language groups - you can make homonym/homophone cards, opposite cards, WH-question cards, and so much more!

I also found a use for the Dry Erase Cards - I used them for a listening activity with my language groups. Because these cards are double sided, they lend themselves well to alternate response mode activities. I drew a happy face on one side and a sad face on the other. Each student in the group received one of these dual-sided cards. Then they had to listen to conditional statements (e.g. "If you have brown hair, hold up your happy face") and follow the directions. This was great for working on following directions and general listening skills. A note: To prevent smearing on these cards, you may want to consider Vis-A-Vis Markers.What is really nice about the dry erase deck is that it can be reused over and over.

This is a therapy activity I will definitely keep doing again and again as I cycle through new students. I'm so glad I found these cards!!