

Due to some craziness in my personal life, I had to take a break from blogging for a while. I did have most of this post sitting there in draft form, and really want to finally get it posted here, since my students had such a great time with this unit!
Since we had just covered Rocks and Minerals in Speech, it made sense to tackle fossils next! A lot of my students are really interested in dinosaurs, so of course this unit was a big hit with many of them. To my surprise, a lot of my kiddos were able to name all kinds of dinosaurs, but didn't exactly know what a fossil was. Most of them thought a fossil was just a leftover dinosaur bone, rather than a rock. Below are some of the various activities I did with my groups (of course tailored to their various skill levels and type of goal they were working on):
1. Learning about the different types of fossils
Before any of the activities, I did briefly explain the different types of fossils to my older students. Here's the run-down (don't worry, I had to google it, too!):
- mold fossils (a fossilized impression made in the substrate - a negative image of the organism)
- cast fossils (formed when a mold is filled in)
- trace fossils = ichnofossils (fossilized nests, gastroliths, burrows, footprints, etc.)
- true form fossils (fossils of the actual animal or animal part).

2. Exploring and matching cast fossils
For this, we used this Fossil Sorting Activity Kit by Dancing Bear (the same company the mineral kit was from). We used this kit to work on describing, comparing and contrasting, matching the fossils to the cards, and to practice articulation targets by saying the name of the fossil / reading the description from the cards out loud. The kit comes with a couple of magnifying glasses that students could use to get a better look. I used a jewelry organizer to store the fossils, but the kit also comes with small plastic bags for this purpose. This was definitely a hit, kids still ask me if we can "do the fossils again" (even though we did this back in January).
3. Matching "bones" to their mold fossils
For this activity, I purchased the Safari Toob with the Prehistoric mammal skulls as well as some of the Crayola Air Dry Clay (I initially tried Playdoh... DON'T! It got stuck to my skulls and created a giant headache). I used the clay to make some spheres that I patted flat and then used a skull to make an imprint of the mammal. After letting the clay dry, we had the perfect matching activity!
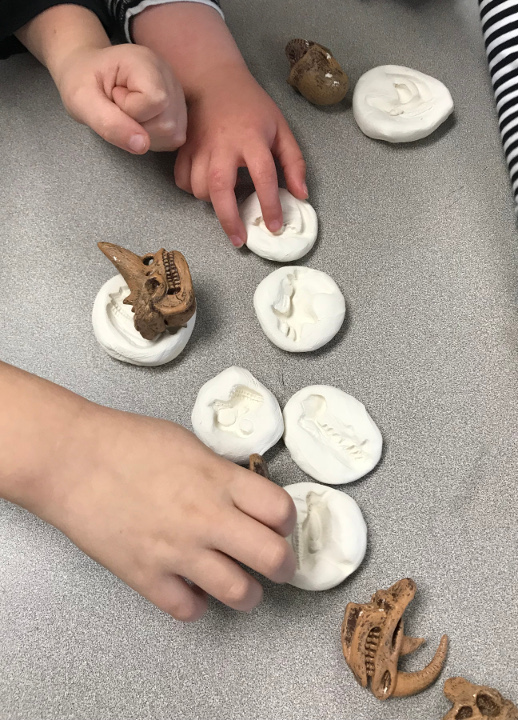


4. Making mold fossils
This was a nice activity for kids to take home! All you need are some toy dinosaur bones and Playdoh (or the clay from the previous activity). Have students make a sphere and pat it flat to get an oval shape (just make sure it's not too flat, or they might make holes if pressing to hard). Then have them press down their dinosaur to make a mold fossil. Let it dry and then let students take it home. This was a quick and easy activity for my younger students.
5. Making a True Form Fossil
 I reserved this activity for my 5th graders.If you've seen "Jurassic Park", then you'll be familiar with bugs encased in Amber. I had my students re-create this true form fossil by having them trace the shape of a clear glass gem (like these vase fillers) onto a piece of construction paper, draw a bug in the middle of the circle, and color the background yellow-orange-ish. After cutting out the circle we used Mod-Podge to glue the gem to the paper. It made a pretty craft that could easily be turned into a fridge magnet.
All in all, my students really enjoyed the fossils unit and got exposed to lots of new vocabulary and concepts. Since they're still asking about it, I'll definitely be bringing some of the activities back this year!


